
Librarians create physical displays of books in the library. We showcase new books, old books, romance books, red books… Well, you get the picture. But unless you have the tools built into your ILS or have added a collection to a social networking site (like LibraryThing or Goodreads), making your own digital showcase – and linking the books to your catalog – can be a challenge.
But, did you know that you can fake your own book cover widget? These instructions were made with WordPress, but you should be able to apple the steps to another blog platform.
Outcome: Sidebar widgets showing book covers and linking to (in this case) the item records in NHDB.
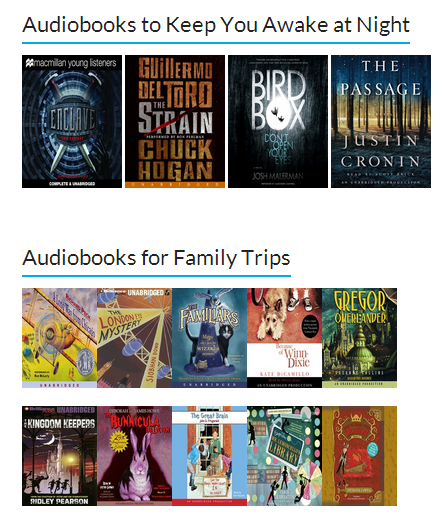 Step 1: Create a list of titles to display
Make sure that each title is available in the desired format (eBook or audiobook, etc.).
Step 2: Start a new blog post in WordPress
You won’t publish this post (unless you want to), but you will use the HTML editing tools built into WordPress’ blog post.
Step 3: Find the image/record in your online collection of choice (NHDB, for example)
Step 4: Copy the image URL
In our NHDB catalog, I like to copy the smaller image from the results page (in list view) instead of the image from the item record itself, which is much larger.
Find the image, right-click on the image and copy (or clip) the image URL.
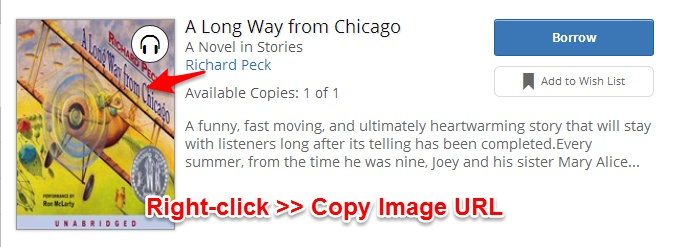
Step 5: Insert media into WP
• Go back to the tab containing your new WP post.
• Click on “Insert Media.”
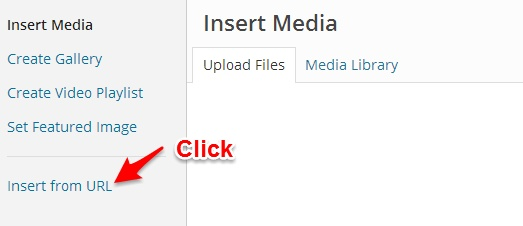
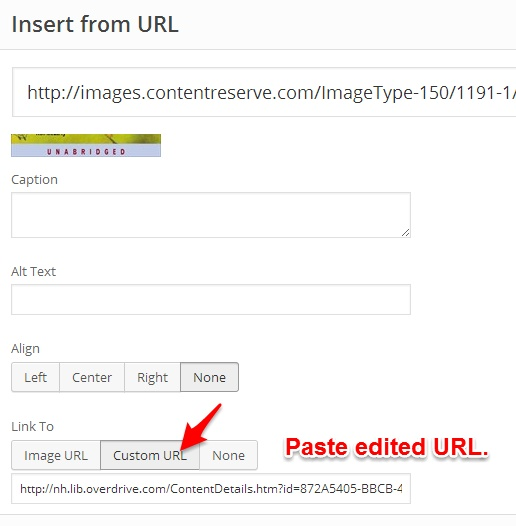
• From the left side, look for the link to “Insert from URL.”
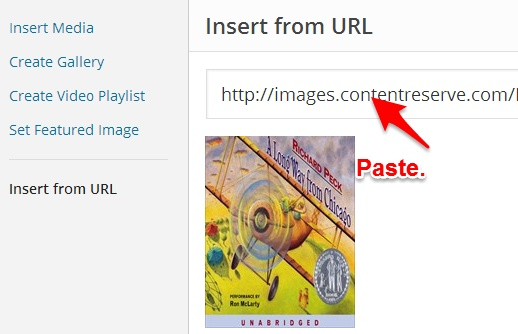
• Paste the copied link into the URL box.
• Scroll down and find the option to paste in a “Link to” custom URL.
• Go back to the NHDB tab and click on the book cover to see the item record. (It’s important that you are getting the URL to the actual item record.)
• Instead of just copying the entire URL – which includes a session ID that could expire – you’ll want to delete the red text, as such, before copying the link.
• http://nh.lib.overdrive.com/ED78376D-EFDA-4442-8112-52061B02DA0A/10/50/en/ContentDetails.htm?id=872A5405-BBCB-40AA-96CF-AD3731A64C82
• Paste the link in the WP “Insert from URL >> Link to: Custom URL.”
Follow these steps for all of the book covers that you want to include in your widget.
Step 6: Edit the size of the book covers
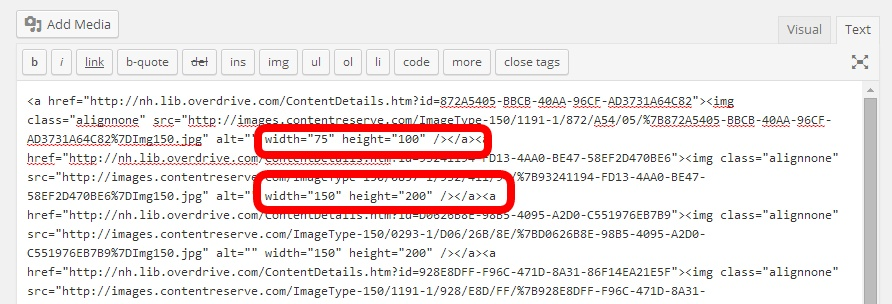
Click on the “Text” tab of the blog post to view the HTML.
By default, the size of the book covers is 150 by 200. This is a little large for my liking. I reduced my images in half to 75 by 100. After manually editing the first instance of the width and height, I copied and pasted the rest of the width/heights.
Step 7: Save and copy
• Stay in the “Text” tab of the blog post.
• Click once in the HTML.
• Press Ctrl-a to select (highlight) all of the text.
• Press Ctrl-c to copy all of the text.
• Save as draft (if you don’t want to publish this as a blog post.
Step 8: Add a widget
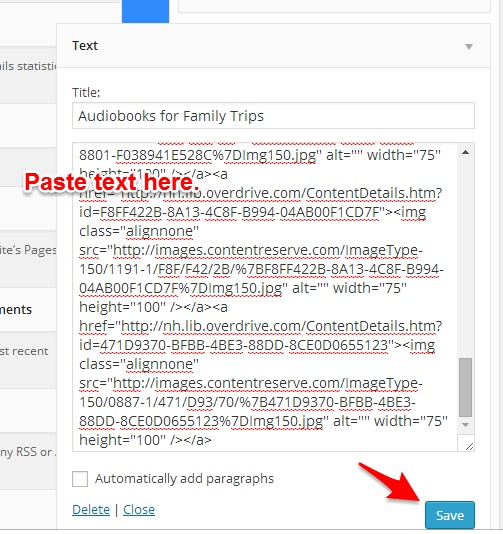
• In WordPress >> Dashboard >> Appearance >> Widgets, add a new text widget to your desired sidebar location.
• Paste (Ctrl-v) the copied HTML into the box.
• Give the widget a title.
• Save the widget.
• View the live site.
Bonus tip: If you decide to publish your blog post, you can also add “captions” to each of the images. Just be sure to add alignment to each image to keep everything looking good.
• In WordPress >> edit blog post >> Visual tab >> click on each image (one at a time)…
• Click on the edit (pencil) that appears over each image.
• In the editing screen, add a caption and click left alignment.