
Add places to a Google Map for your custom project by uploading existing location data.
Note: If you are developing a Google Form (instructions) for the purpose of creating a Google map, be sure to collect data for the following:
- Place name
- Address
- Town
- State
- Zip code
Let’s get started!
- Visit https://maps.google.com
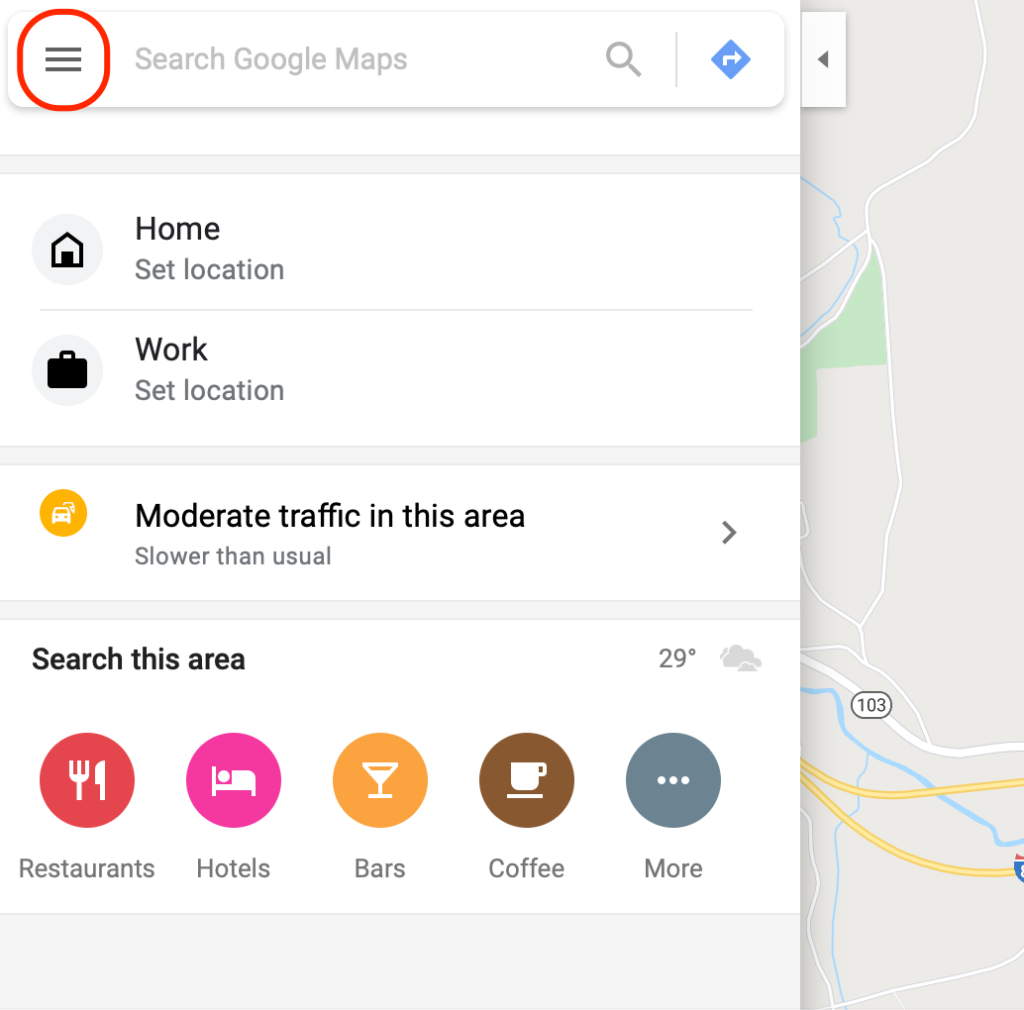
- Click on the “menu” icon…
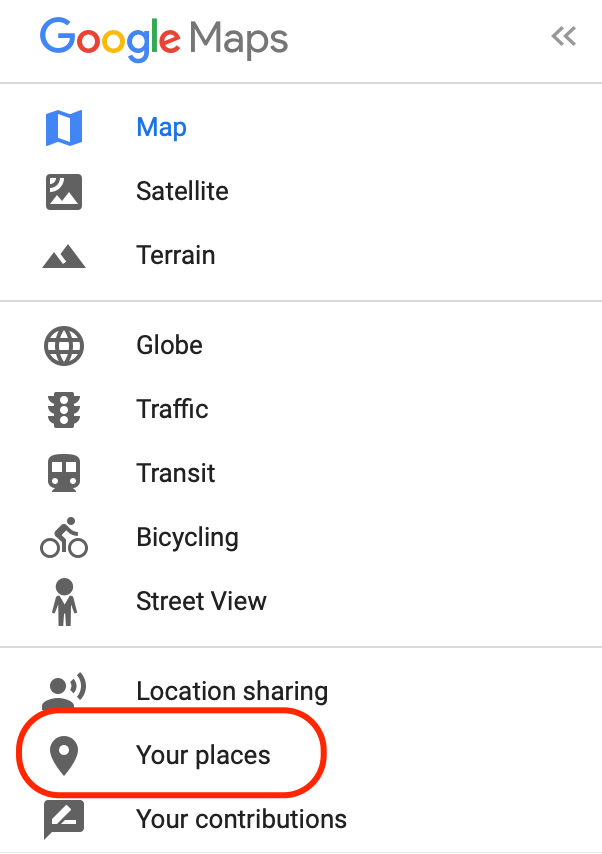
- Click on “Your places.”
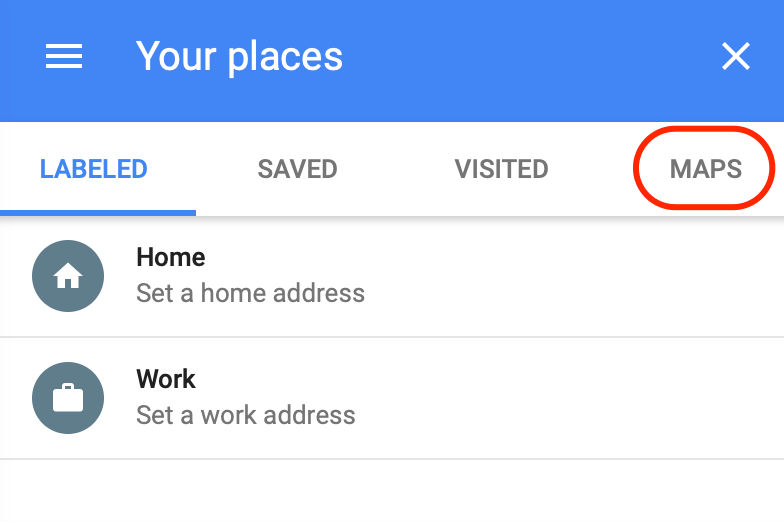
- Click on MAPS.
- Click “CREATE MAP.”
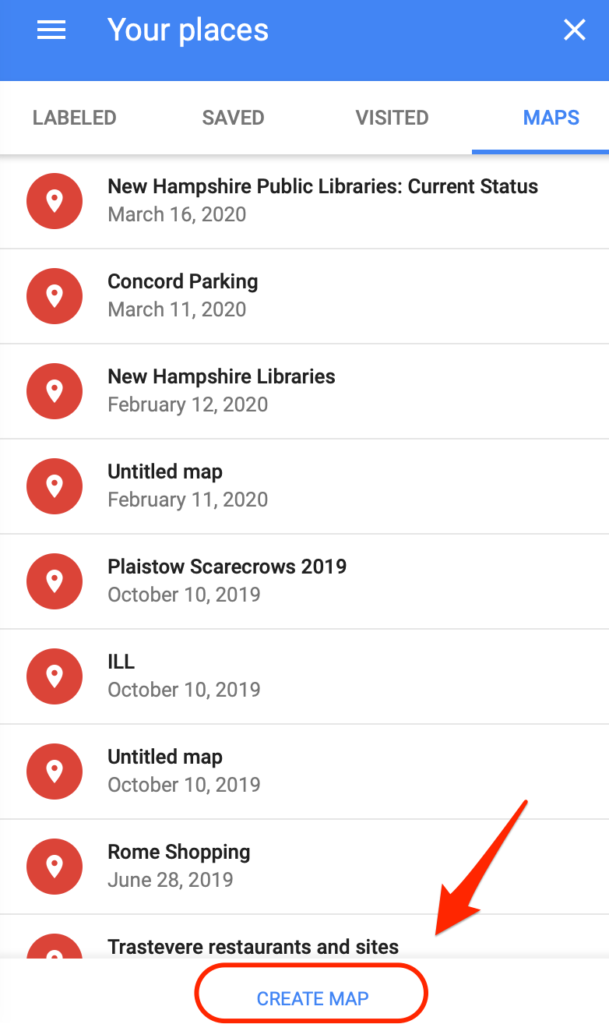
Congratulations! You have a map.
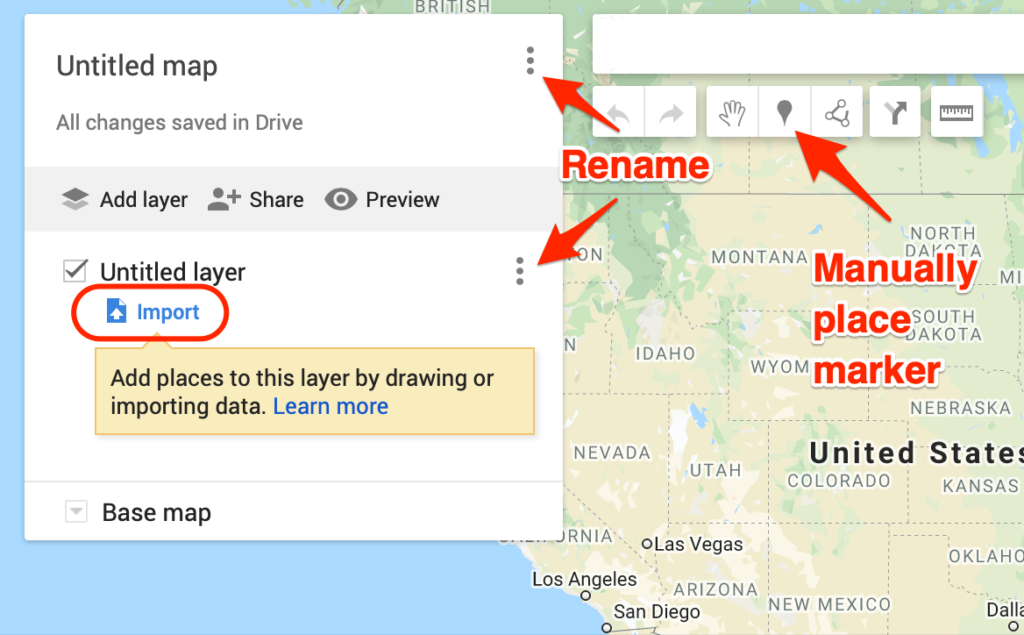
- Rename the map to something informative.
- Note the ability to manually place a marker.
- This is helpful for historical data when the building may no longer exist.
- Note that a “layer” is a set of imported data.
- Rename this layer to something the public will understand.
- Click on “Import” to bring in your data from a spreadsheet or Google Drive.
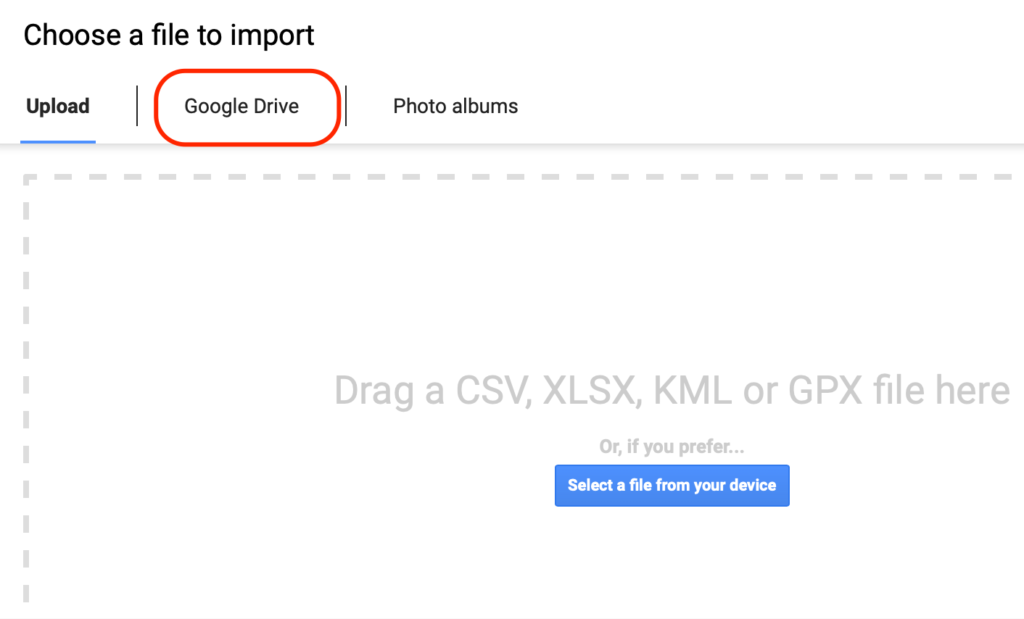
- If you are importing the location data from another source, select your source.
- In this case, we will be using a Google Sheet.
- Navigate your Google Drive to find your sheet…
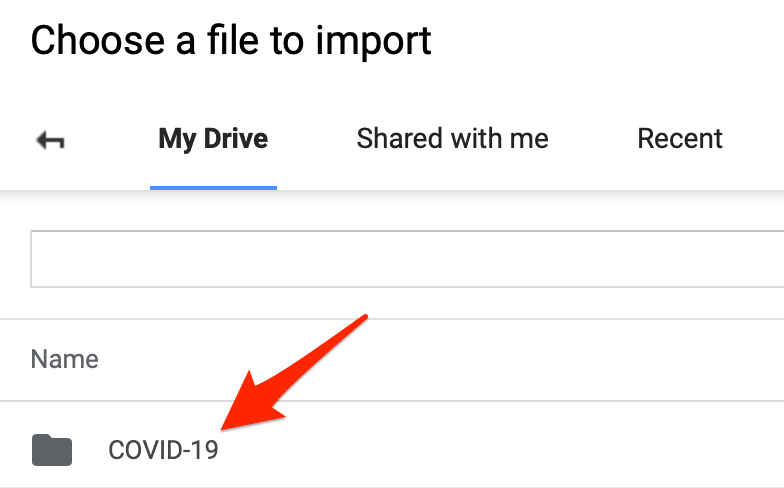
- Select your Sheet.
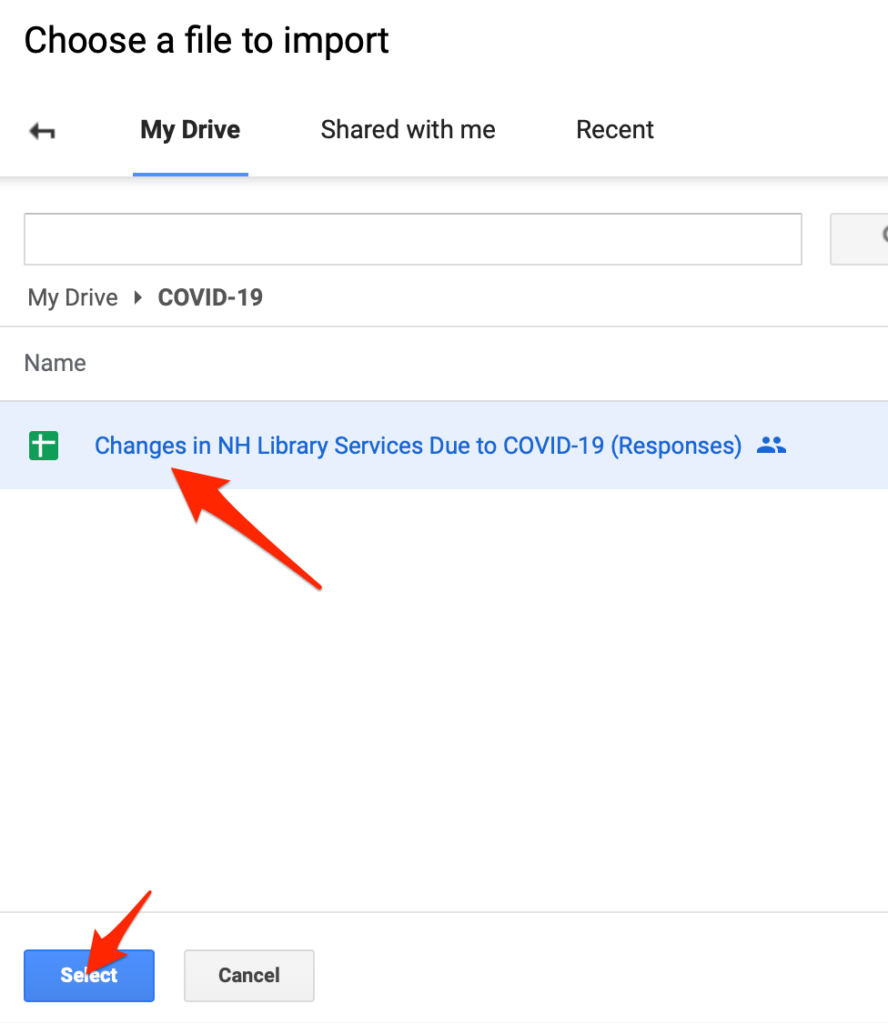
- Note: It is important that your sheet includes:
- Place names: In this case, the place name is “Library Name.”
- Location data: Be sure to include/collect the address, town, state, and zip code.
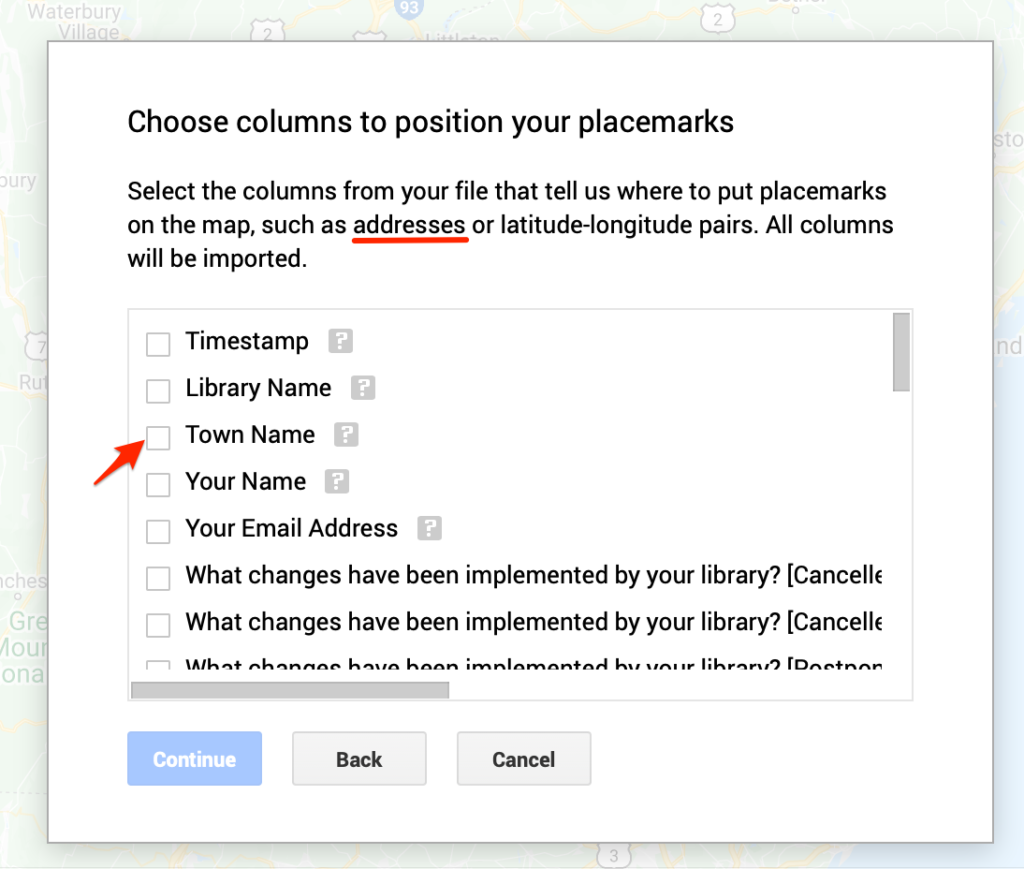
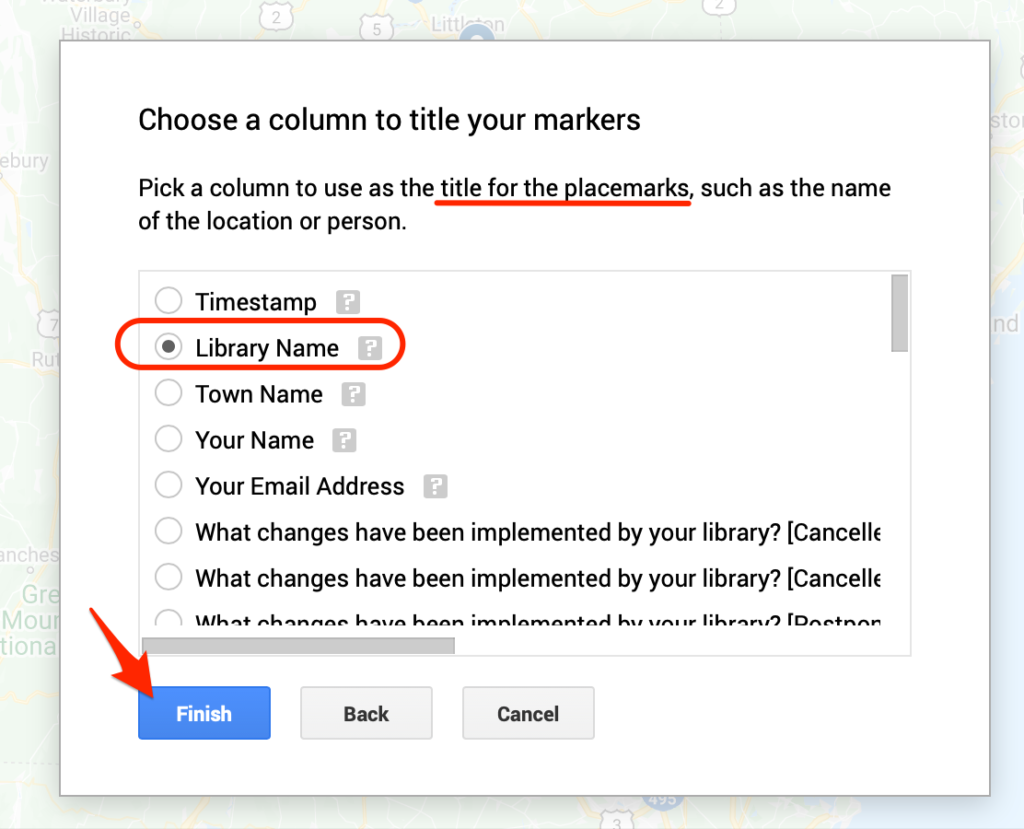
- Now select the column for place names. In my case, I used “Library Name.” This is the heading that will appear on every place marker.
- Now you can decide which column data you wish to show. In my case, I wanted to group the libraries by their status and set library name as the label.
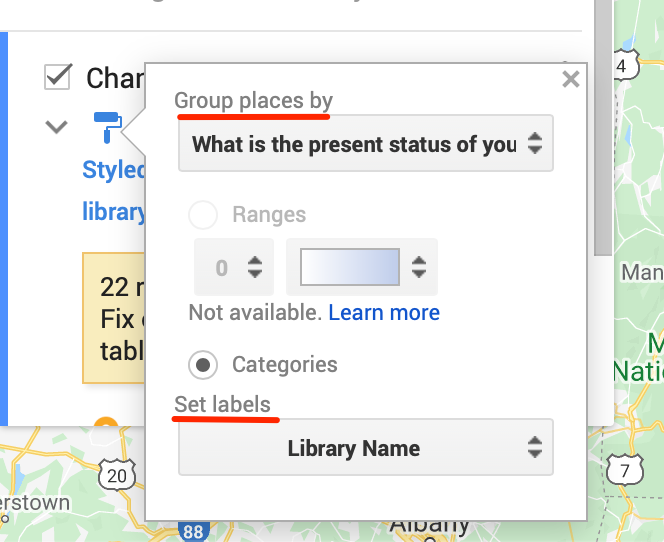
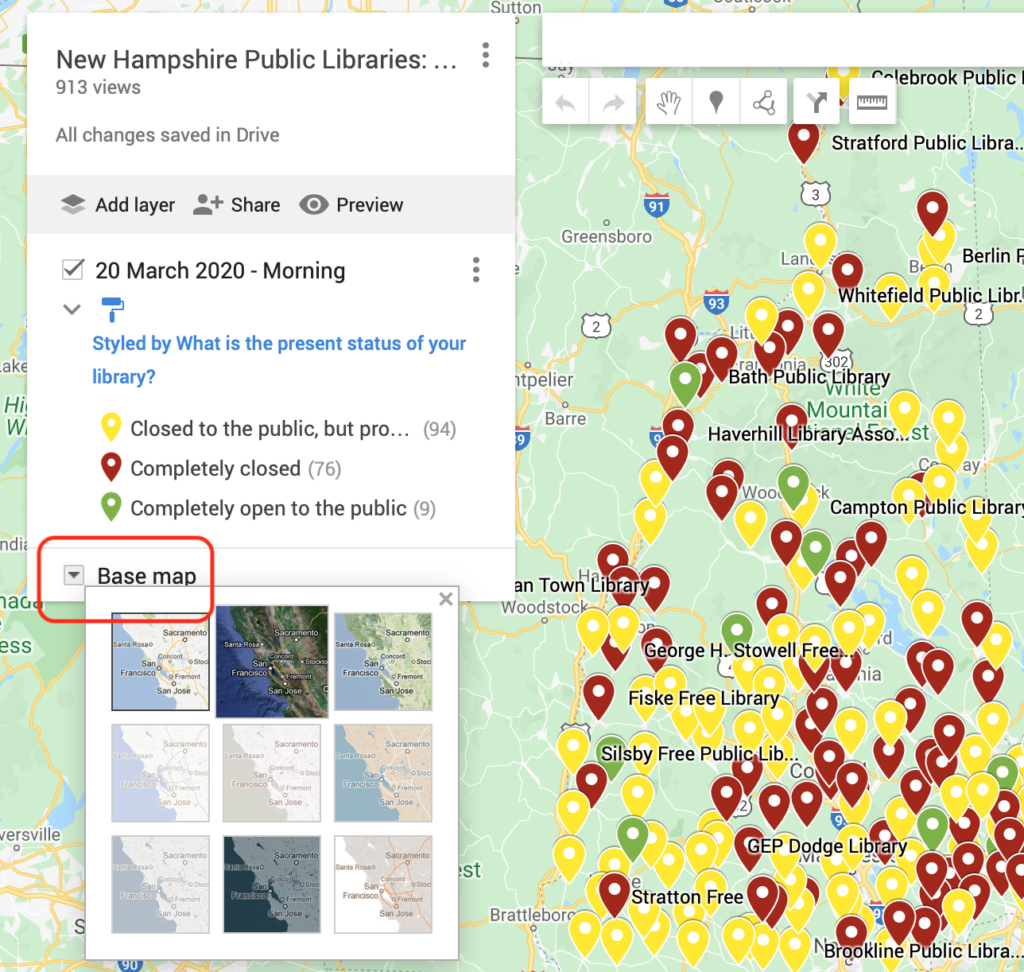
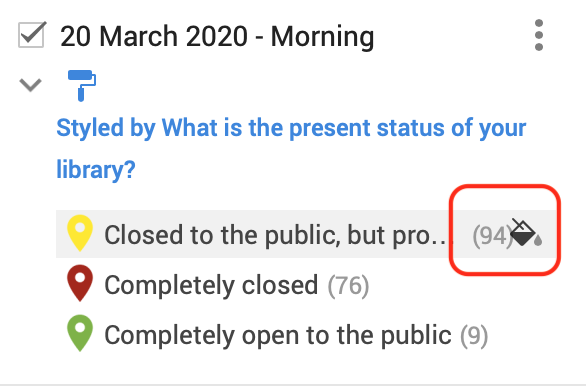
- Note that you can change the colors of the markers by placing your mouse near the number value and selecting a new color (and icon).
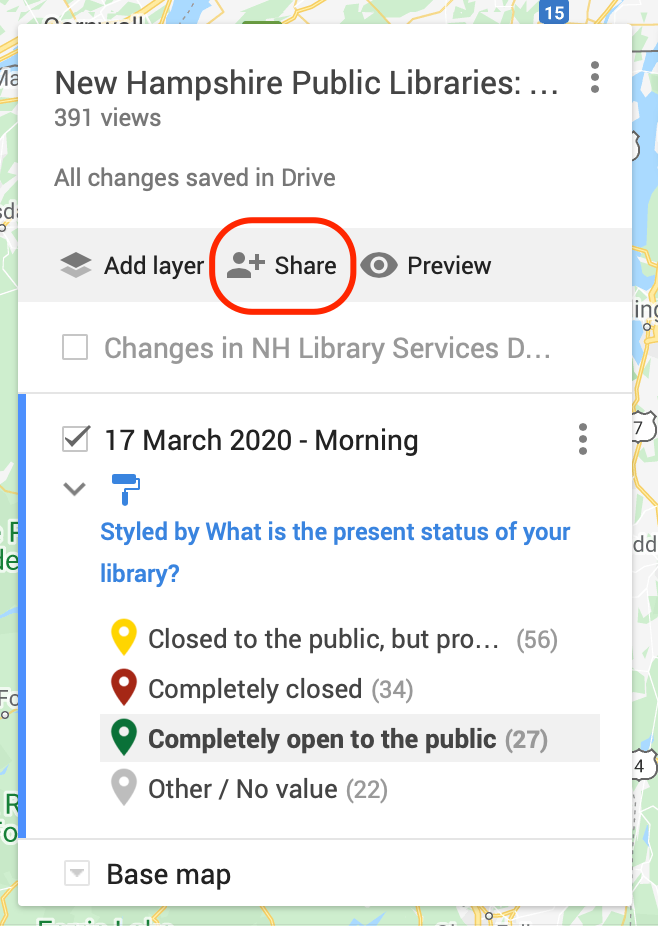
- Click on “Share” to get a URL to share your map.
- Please ignore the 22 “no value” items on my screenshot…
Creating a Google Map